Wednesday, December 7, 2011

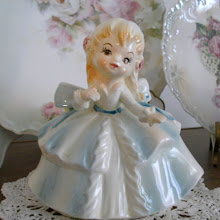
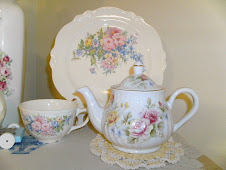
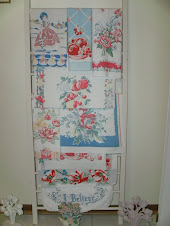
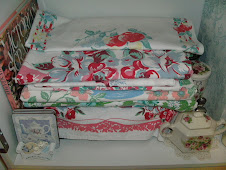
Pretty In Pink.....

Hi Girls..

I don't know about you, but I never tire of my pretty pinks and pale blues so to have them surrounding me most of the time just makes me feel happy..


While I love seeing all the beautiful shades of white and cream around this wonderful world of Blogland and on Pinterest too, I don't think I'll ever be decorating my house with those colors. 


So I'll just continue to surround myself with the colors I love and that make me happy while still admiring the beautiful homes and collections of others.

I find that old saying that we must do for ourselves what makes us happy and not worry about following the latest trends or worrying about what others think to be so true.

Don't you agree??

See you soon..

Friday, December 2, 2011

Time Flies.....

Yep, that's right girls.

Time flies and once again, I've turned into a total blog slacker.

Well, I'm changing that up for today at least, popping in to say hello and to share some pretty pale pinks  from my photo archives with you.  Had to dig it out of my archives because I've been a picture taking slacker too.


Definitely not a Christmas themed blog post like most of you have been doing, but I think that's OK.  We must not forget that we all need to see a bit of pink every now and then.

Have a wonderful weekend !!

Sunday, November 20, 2011

More Crafting Goodness...

Hey there girls..

Hope you all have been enjoying your weekend.  While the first measurable snow was falling here in the Minneapolis area yesterday, I spent part of the day in my craft room creating some more shabby inspired pretties.

Pretties like this adorable little wall hanging that I created using one piece out of a pack of chipboard mini album pages I had purchased from the dollar bins at Michael's.  Well, make that $1.50 bin because they recently upped the prices on those, but they were still a great bargain..

 
And as I usually do, I had to fancy it up a bit more with all the cute little embellishments..  My favorite on this one being the darling little posy in the right hand corner.  So cute!!


Well, that's all for today.  Thanks for stopping by for a visit.  Now it's back the craft room for me to do some more shabby inspired creating.  

Enjoy the rest of your weekend and come back and visit again soon.

Wednesday, November 16, 2011

From Shabby Blocks To Shabby Birdhouses...

Hey there girls...

I'm still on a roll with my crafty alterations.  In my last post, I shared pictures of some of the shabby altered blocks I made using up some of my scraps of scrapbook paper. 

Well, in addition to those shabby blocks, I also altered a small unfinished birdhouse that I had purchased from the dollar bins at Michael's. 

To start, the birdhouse received a few coats of white craft paint just like the blocks..


Then, using some of the same scrapbook papers that I used for the blocks, I turned that little birdhouse into this...


I even added some beaded trim around the edges just to add a bit more detail. 


Another fun and easy project.  I will definitely be altering a few more birdhouses in the near future.  I can already see a row of these cute shabby little birdhouses lined up on the window sill in my craft room adding a bit of pastel/shabby goodness to my crafting space.

I hope you are enjoying seeing all of my crafty creations and that I've inspired you in some way to dive into some artsy craftsy projects of your own.

Until next time...

Sunday, November 13, 2011

Creating Shabby Blocks With Paper Scraps....

Hey there girls... Happy Saturday!!

Have you ever wondered what to do with your paper scraps that are just too pretty to throw away?  Well, if you have, it's a good thing you stopped by today because I have a great idea to share with you.

You can use those paper scraps to make some beautiful shabby altered wood blocks.  An idea I had seen floating out in Blogland some time ago.

When I first saw the idea, I went to Michael's and purchased some unfinished 2 inch wood blocks which I painted white with some craft paint.  I didn't cover the entire block with the paint, as I mostly just wanted to cover the edges.


Then, I cut the leftover scraps of the beautiful rose patterned paper I used on my altered wood box that I shared in my last post, cutting the pieces just a tad bit smaller than the wood blocks.  I also cut some coordinating papers in the same size.  All the cutting done with my handy dandy paper cutter.


Then using some of that wonderful Modge Podge, I glued the paper scraps onto the blocks, turning them into pretty and shabby looking blocks.  They turned out so cute and were so simple to make.  Just the kind of artsy crafty project I like.


After making these, I made a few more using some of my hoarded Melissa Francis scrapbook papers..


Oh, the endless possibilities one has when it comes to playing with paper, scissors and glue..

Well, that's all I have for today.  I'm heading out now to go to Michael's to buy some more wooden blocks using the 25% off coupon I just printed of their website. 

Have a great weekend and I'll see you again soon !!

Tuesday, November 8, 2011

From Bland To Beautiful .................

OK, the alteration bug has hit me and I'm on a roll..

If you may recall, earlier this summer I picked up this small dark wood box at my local Goodwill store, paying just $5.00 for the box. 


It took me quite awhile to get around to actually transforming it as I had intended, however, it's finally done and today you get to see the finished results.

The first step in transforming the box was painting it white, both inside and out.


Then, using some gorgeous rose patterned scrapbook paper which I had cut to size, I modgepodged the scrapbook papers to the inside and outside of the box..


Because the white paint was just a bit too bright and because I wanted to give it a more antique/distressed look, I used some Walnut Ink stain and a cotton ball to lightly cover the white painted areas.


I am so pleased with the end result and I'm loving how it turned out.  It's definitely worth remembering that using beautiful scrapbook papers doesn't have to be limited to scrapbooking or card making.  You can do all sorts of creative things with the paper.

Thanks for stopping by today.  Hope you enjoyed seeing my latest little thrift store transformation.

Saturday, November 5, 2011

Another Thrift Store Transformation....

Hey there girls..

Just popping in to say hello and to share with you another thrift store transformation.

What I found at the thrift store recently was a darling little two tiered metal basket stand (or whatever it is exactly that they are called) for just $4.00.  When I bought it, it was black in color, but I knew I could quickly and easily transform it into something a bit more to my taste.

So I found that can of Ballet Pink spray paint out in the garage and went at it, transforming it from its originally ugly black color to a pretty pink.


Once the paint was dry, I used my Martha Stewart circle cutter to cut lightweight pieces of cardboard to use for the base in each "basket" which I then covered with some of my pretty rose patterned scrapbook paper.


I am not happy with how the bottom part turned out as I had to cut the pieces in half to fit in the basket around the center spoke, and now there's a large, unsightly gap between them, so I will be redoing that part of it using a different technique.

Once again, I find myself in love with the thrift stores and being able to transform a once slightly ugly and inexpensive item into something totally adorable.

Hope you enjoyed seeing my latest makeover.  Have a great weekend and I'll see you again soon..

Sunday, October 30, 2011

Oh Dear..........

It seems that just like many of you, I too seem to have become totally addicted to Pinterest..

That's right girls.  I signed up for Pinterest and I've become totally addicted to all the awesome creativity out there.  I could spend hours and hours everyday perusing through everyone's glorious Pinterest boards to get some great ideas for crafting, decorating, cooking or whatever may strike my fancy.

The first crafty idea I jumped on came from this idea (photo courtesy of Pinterest).. 


Wrapping your laces and trimps around some pretty paper covered pieces of cardboard which can be cut into whatever shape a person desires.

So using my not so great drawing skills, I drew my own template design, traced it onto a peice of heavy cardboard and I created these...


I must say, they did turn out quite cute and I will definately be making some more.


What another fun and simple idea.   I hope this inspires you to do something similar with your pretty laces and trims.

Come visit me on Pinterest and check out my Pinterest boards and become a follower if you haven't already.

Just try not to let the Pinterest addiction catch you too..

Saturday, October 22, 2011

No Fall Decor At My House...

Well, I'm feeling like I must be the only one out here in Blogland who hasn't been busy redecorating my house for Fall in all those browns, tans, blacks and orange colors. 

While I've loved seeing how all of you are readying your homes for Fall and Halloween, I'm just not a big fan of those darker, Fallish colors myself so it's still all about pretty pastels at my house.  Just like it is during the rest of the year.

So, while most of you are sharing beautiful Fall decor, I'm here to throw in some pinks, yellows, pale greens and light purple to mix things up.


Wishing you all a wonderful Fall weekend!!

Sunday, October 16, 2011

Chipboard Mini Album...

Hey there girls..

Do you recall a few posts back where I gave you a sneak peak at another mini album I had just started working on? 


Well, I finished working on this one last weekend and sadly, it took me another full week to get pictures taken of it, but now I have and I'm here to share them with you.  So sit back, relax and I'll just let you enjoy a page by page stroll through the mini album.


And for those of you who asked me previously how I was planning on using the vintage Bingo cards that I purchased at Junk Bonanza last month in my craft projects, here's one way.  I altered both the front and back of this one and added it to my mini album.


It makes for a cute addition to the album don't you think?

Now, let's continue with the rest of the album shall we..


Well, I hope you enjoyed seeing my latest crafty creation.  I had fun making this one and don't laugh, but I've already started working on another one too.  I think I've become just a tad bit addicted to making these.

You'll get to see the new one when it's completed. 

Enjoy the rest of your weekend and I'll be back soon.